

How To Setup Home Network Windows 10
HomeGroup is a network sharing characteristic that has been part of Windows for a long time, and it's as well part of Windows 10. Microsoft included HomeGroup to let Windows devices to share resources with other PCs on a local network with an like shooting fish in a barrel to gear up approach that anyone can utilize.
HomeGroup is a feature all-time suited for pocket-sized home networks to share files and printers with devices running Windows 10, Windows viii.1, and Windows 7. Also, yous can also configure media streaming for other devices, such as Xbox One, to play music and video from your computer on the biggest screen in the house.
In this Windows 10 guide, we'll walk you through the steps to set up and manage a HomeGroup to share resource with other users on your local network.
Before you begin
HomeGroup is very particular on the network configurations y'all apply and if your computer was previously function of another HomeGroup. To make sure you will be able to configure everything correctly, shut down all other the computers on the network, leaving just the computer you'll use to create the new HomeGroup turned on.
Additionally, yous desire to make certain all your devices are running Internet Protocol Version half-dozen (TCP/IPv6). Otherwise, you won't exist able to join any computers to HomeGroup.
- Employ the Windows key + X keyboard shortcut to open the Power User menu, and click Network Connections.
- Correct-click the network adapter you use to connect to the cyberspace and select Properties.
-
Brand sure to check the Internet Protocol Version 6 (TCP/IPv6) pick.

- Click OK.

How to create a HomeGroup on Windows 10
HomeGroup hasn't changed much from previous versions, equally such nosotros'll exist using Command Panel to make the configuration.
- Open the Outset carte du jour, do a search for HomeGroup and press Enter.
-
Click Create a homegroup.

- On the wizard, click Next.
-
Cull what to share on the network. Past default Windows sets Pictures, Videos, Music, Printers & Devices every bit Shared. However, the Documents binder is marked every bit Not shared.
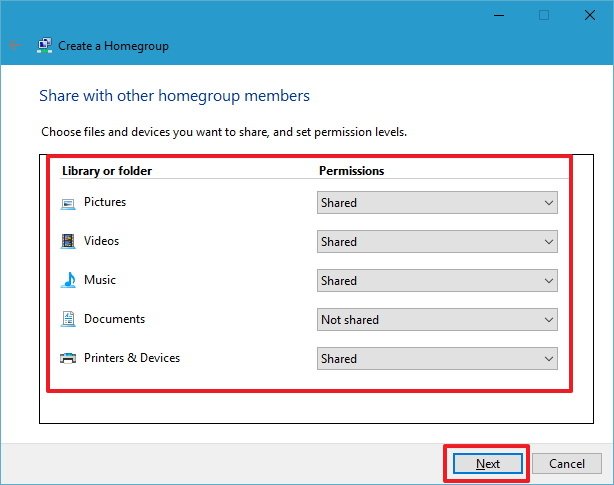
Note: The sharing options you choose volition only apply to devices connecting with unlike accounts. If yous sign-in with the same user account on another figurer, you will have admission to all files regardless of what you chose to share.
- Once you've decided what content to share, click Next.
-
The sorcerer will complete the setup, and you'll be presented with a HomeGroup password, which is needed to allow other computers to access files and printers. Write down or click the link to impress the password.

- Click Finish to consummate the chore.


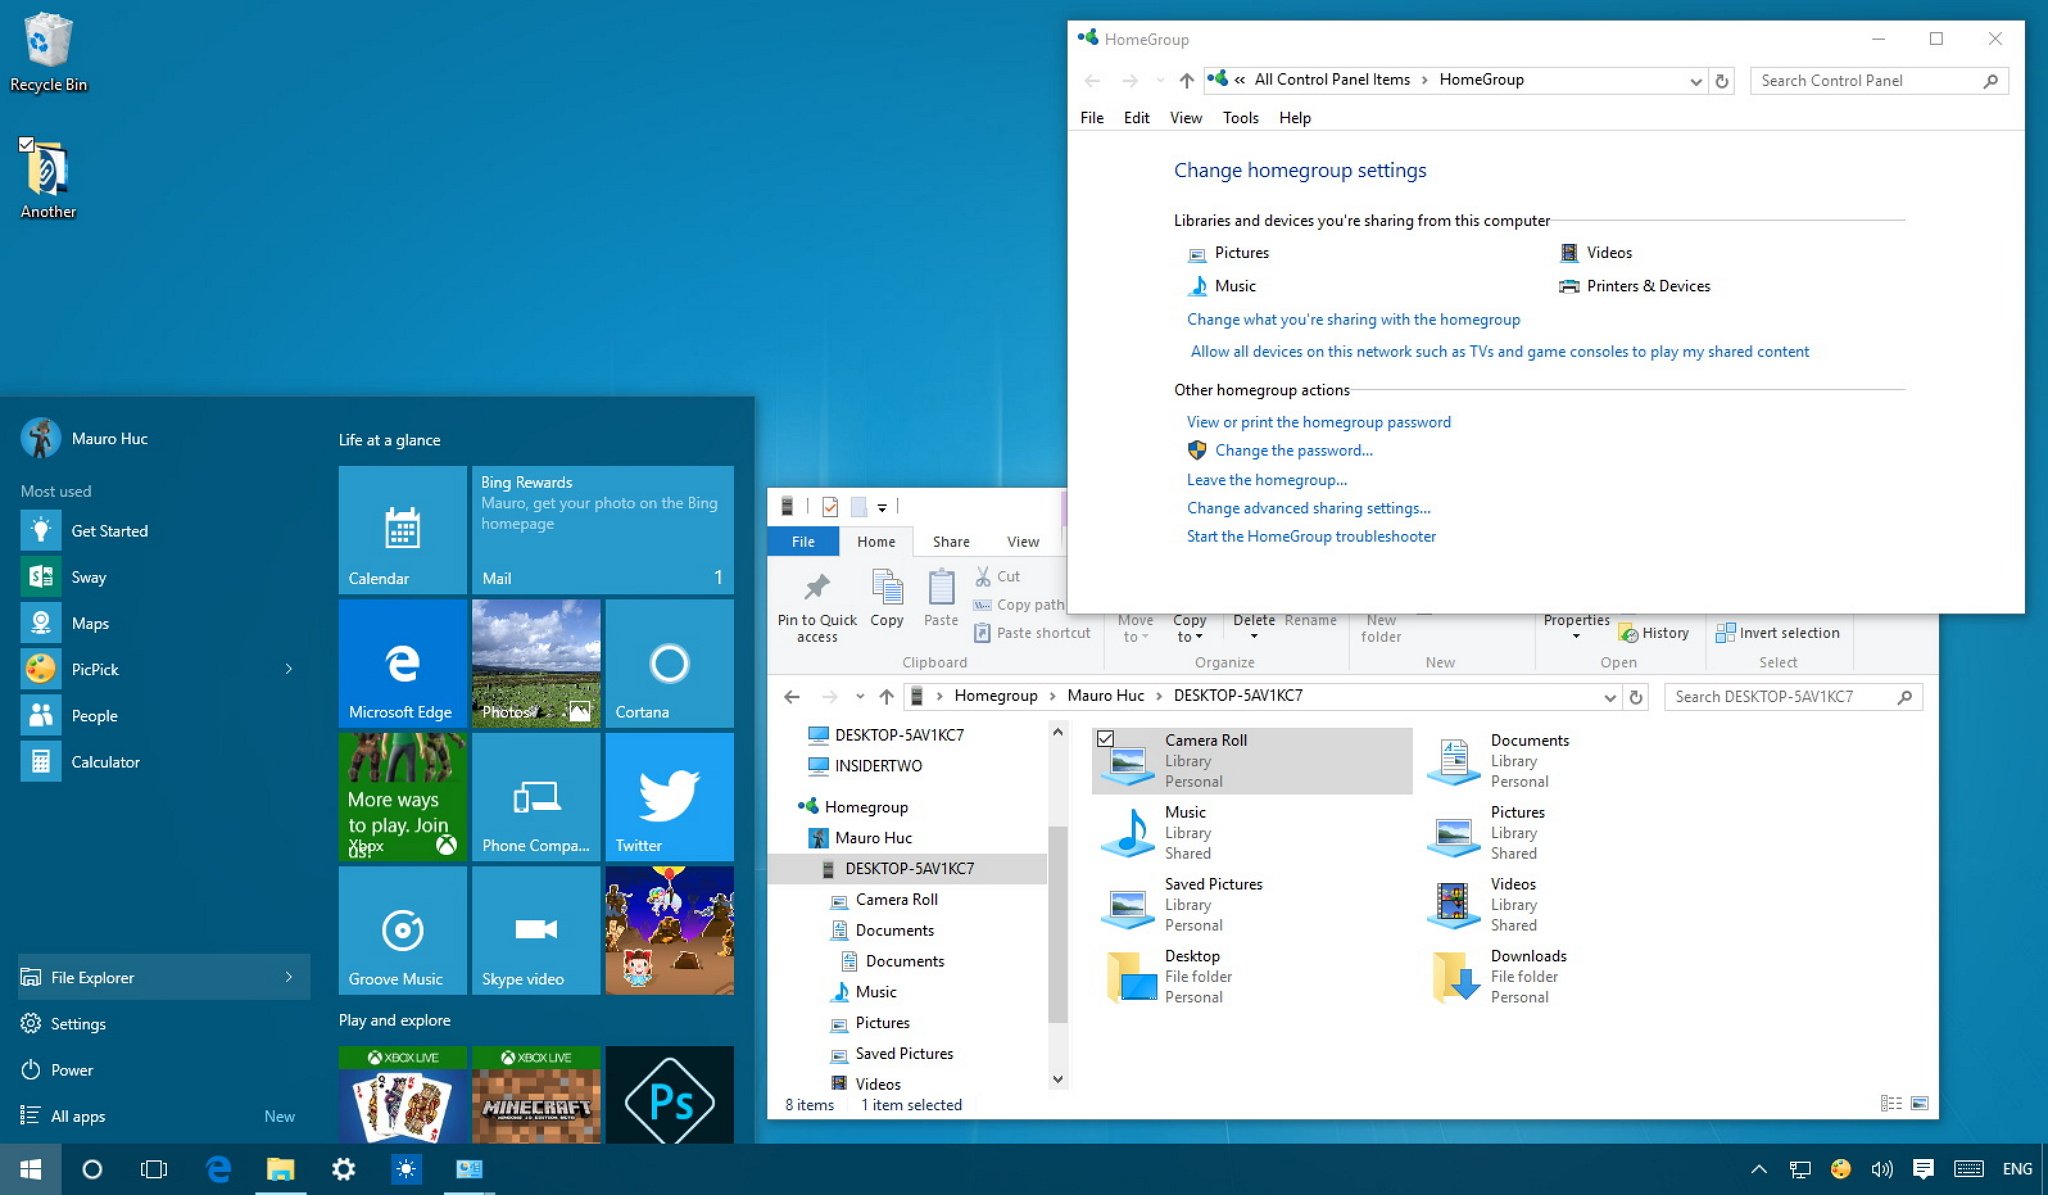
How to modify which content is shared with your HomeGroup
If at any time, you want to alter the folders you share with other computers exercise the following:
-
Click the Change what yous're sharing with the homegroup link.

- Brand the right changes by using the drib downwardly card and choosing Shared or Not shared for each folder.
- Click Next.
-
Click Cease to consummate the task.

How to change your HomeGroup media streaming options
HomeGroup besides allows you to command which media devices, including TV, Xbox One, Xbox 360, and PlayStation can admission and stream the content shared on your computer.
On the HomeGroup settings page in Control Panel, click the Permit all devices on this network such every bit TVs and game console to play my shared content link.
The first thing you desire to practise is to pick a name for the media library, as Windows 10 by default uses your account's email address.
Then yous tin click the Choose default settings link to change a few streaming settings, including star rating and parental command settings immune to stream from some other media device.

You tin can as well alter on which networks you volition let devices stream shared content by using the Show devices on drop down menu.
In addition, you tin can configure which devices are allowed to play remote content. Y'all can cake or permit each device individually, or you tin click the Allow All or Block All buttons.

Remember that shared content will be bachelor to other devices as long the device sharing the content is turned on and when information technology's not in slumber mode. If you lot demand to modify the power settings, click the Cull power options link.
How to change your HomeGroup countersign
If for security reasons you need to alter the HomeGroup password, Windows gives you lot the option to change it at any time.
-
Click the Change the password link.
- Brand certain to take all the computers role of HomeGroup are upwards and running.
-
Click Change the countersign.

- Notation the new countersign and click Next.
-
Click Finish.

-
Immediately after getting the password go to each computer'due south HomeGroup settings in Command Panel, and click the Blazon new password push.

-
Type the new password and click Next.

- Click Finish to consummate the job.


How to add computers to a HomeGroup
Now it's the time to turn on all the computers around the house and bring together them to the HomeGroup.
To bring together devices do the post-obit:
- Open the Get-go menu, do a search for HomeGroup and press Enter.
-
Click the Join now button.

Note: If yous don't see the Join at present button, there is something incorrect, make sure you're connected to the network and restart your computer.
- Click Next.
-
Select the content you want to share on the network by using the drib downwardly carte du jour for each folder and click Next.

-
Enter your HomeGroup password and click Side by side.

Note: If you lot're signed into another figurer, but you're using your Microsoft Business relationship, then y'all won't be prompted to enter a password.
- Click Finish to consummate the job.


If you lot're prompted to choose network privacy settings, brand sure to select the Private choice.
In the same manner, you've washed afterward configuring a new HomeGroup steps, for each car you join, y'all'll demand to specify manually the media devices that volition be immune to stream shared content.
How to share additional folders with your HomeGroup on Windows 10
While setting up or joining a new computer to a HomeGroup yous're given the choice to share merely your Pictures, Videos, Music, and Documents folders, just y'all can always share more folders.
You tin share more content in two dissimilar means, including calculation new locations to the libraries currently being shared, or you tin also share a new folder as y'all would usually do in Windows.
How to add new folders to shared HomeGroup libraries
- Use the Windows cardinal + East keyboard shortcut to open up File Explorer.
- On the left pane, expand your computer'southward libraries on HomeGroup.
- Right-click Documents.
-
Click Backdrop.

-
Click Add.

- Select the folder you want to share and click Include folder.
- Click Use.
- Click OK.


Now the binder will be accessible by anyone joined in the HomeGroup when they browse the Documents folder.
How to add new folder via Windows network share to your HomeGroup
- Correct-click the folder y'all want to share.
-
Select Share with and click the Homegroup (view) option.


Users can access the newly shared folder by:
- Using the Windows key + E keyboard shortcut to open File Explorer.
- Clicking Network on the left pane.
-
Double-clicking the computer name with shared content, and browsing the folder location.


Past default, every HomeGroup binder shared on the network are set up with read only permissions. It has to exist this way to prevent accidental deletions and modification to your files by other users. Even so, if yous're using your aforementioned Microsoft business relationship to admission content from some other calculator, then yous will have read and write permissions.
If you lot demand other users to be able to admission, modify, and delete content, the best solution is to share another folder and granting users view and edit permissions.
You lot tin can practice this with the following instructions:
- Right-click the folder yous want to share.
-
Select Share with and click the Homegroup (view and edit) option.
How to remove a PC from your HomeGroup in Windows ten
When you no longer want a computer to be function of the HomeGroup, Microsoft makes it very like shooting fish in a barrel remove a device without complicated configurations.
- Click the Leave the homegroup link.
-
Click Leave the homegroup.

- Click Terminate to complete the task.

At whatsoever time, if y'all want to rejoin a computer, you tin easily do this by using the bring together a reckoner to a HomeGroup instructions.
What to practice when your HomeGroup isn't working right
While Microsoft tried to blueprint HomeGroup to exist a feature that works effortlessly, at times things may not work every bit expected. Consider the following tips to troubleshoot and gear up HomeGroup problems on Windows 10.
The first thing yous ever want to do is to make certain all the computer are continued to the network. You can verify past going to Settings > Network & net. Depending on your connectedness, bank check Wi-Fi or Ethernet.

Ofttimes rebooting and trying to create or join a computer to a HomeGroup again will solve the trouble.
Temporarily disable the firewall on your computer. If you're using the Windows Firewall become to Command Panel\All Control Panel Items\Windows Firewall\Customize Settings, and turn off the firewall. If this is the trouble, make sure to configure the firewall correctly, and don't forget to re-enable the firewall after everything is working properly.

Having the incorrect time can also cause problems trying to set upward a HomeGroup. Make sure every computer has the correct fourth dimension. On Windows 10, go to Settings > Time & language and arrange fourth dimension as needed.

Y'all tin't have two computers on the network with the same name. Names must be unique on a HomeGroup. You tin use our previous Windows 10 guide to rename your PC.
Make certain Network discovery, File and printer sharing, and HomeGroup connections are enabled on your private network. But go to Control Panel\All Command Panel Items\Network and Sharing Centre\Advanced sharing settings and turn on all these options.

Your computer can just belong to one HomeGroup, if the it's connected to a dissimilar i, make certain to follow the steps to leave the HomeGroup earlier trying to join.
If you even so can't create or join a new computer to a HomeGroup, Microsoft is besides including a diagnostic tool to fix common problems. On Windows 10, go to Control Panel\All Control Panel Items\HomeGroup, and click the Showtime the HomeGroup troubleshooter link and follow the on-screen directions to gear up the trouble.

Other things you need to know about HomeGroups
- HomeGroup is but available on Windows 7, Windows 8.x, and Windows ten, which means that you won't be able to connect whatever Windows XP and Windows Vista machines.
- There can be only i HomeGroup per network.
- A HomeGroup does not create a hub and spoken network, where a cardinal device has to be up and running for HomeGroup to work. Yet, the computer with shared content must be running for yous to access its files and resources.
- Merely computers joined with a HomeGroup password can use the resources on the local network.
- While HomeGroup has to be configured one time per computer, each user must specify what content is accessible through the network.
- Once you lot fix a HomeGroup on a local network, users likewise have full admission to view and edit content in the Public user folders.
Although we focus on configuring and managing HomeGroup on Windows 10, you tin also connect Windows 7 and Windows 8.x computers to the network and share content.
How do you share files and other resources on your local network? Practice you employ HomeGroup? Allow united states know in the comments below.

How To Setup Home Network Windows 10,
Source: https://www.windowscentral.com/how-setup-and-manage-windows-10-homegroup-local-network
Posted by: martinezlech2001.blogspot.com
0 Response to "How To Setup Home Network Windows 10"
Post a Comment