

How To Make Minecraft Server On Windows 10
Written by: Suparna Ganguly
Are yous a Minecraft buff?
So, why not become your gaming friends to connect with your own Minecraft server on your Windows PC?
With a Minecraft server, you can host the game software for all of your friends. Y'all don't have to look around to play your favorite game and y'all tin build blocks at your own car.
In this tutorial, you'll learn the steps to install Minecraft Server on Windows, what are the requirements and volition be able to become Minecraft. Now, let's outset.
Minecraft Server Prerequisites
Y'all'll need the system requirements given below:
- A Windows 10 server or desktop
- 4GB RAM
- An active network connection with an unlimited bandwidth plan
To boost your server performance, y'all need a hulking and faster CPU to come across the multiplayer server demands.
Installing Minecraft Server on Windows
#i: Download Java on Windows 10
Download the latest Java from this site on your Windows 10 desktop.
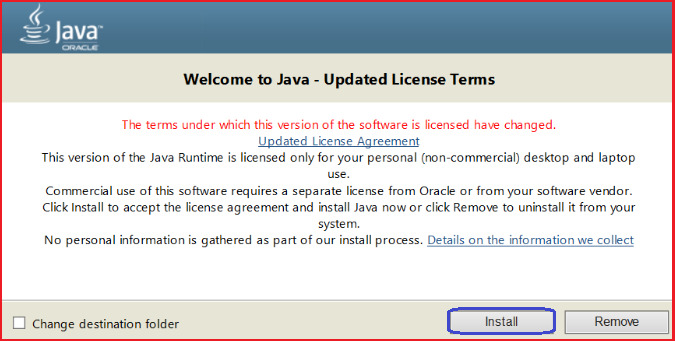
Open the .exe file. Printing the Install button.
And then, restart your PC after the installation is finished.
Best Tip: Use the latest version of Java to get the best out of your Java. And ever update the java yous're using.
#2: Download Minecraft Server
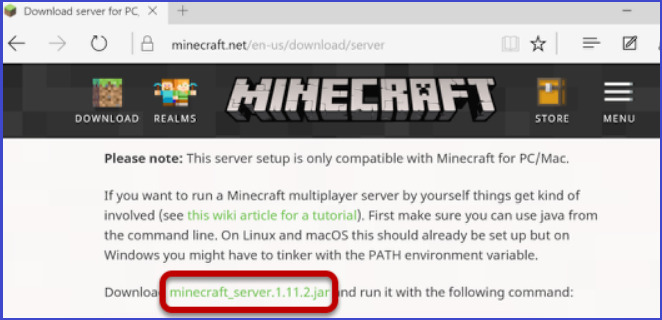
Download Minecraft Server from their official website .
Minecraft Vanilla JAR file will be downloaded to your computer. And it'll be saved to your Downloads binder.
Alternately, yous can download Minecraft Server from the Bukkit or Forge project. However, in that case, the installation steps and running JARs might be different.
Now, navigate to the Downloads folder. Transfer the Minecraft folder to a suitable location of your pick. We recommend having a dedicated folder on your Windows ten desktop reckoner for the Minecraft server.
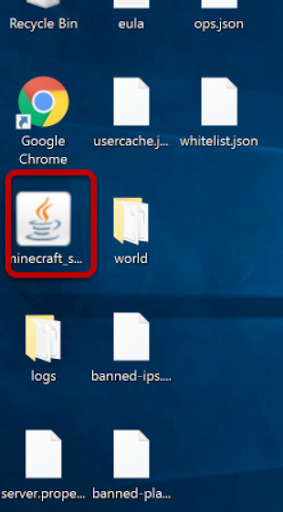
#3: Excerpt Files from Minecraft JAR
To excerpt files on your Windows ten PC from the Minecraft JAR file, double click on it.
It'll excerpt files that nosotros require before going ahead with the server.
#4: Set up Up the Server Properties
Once the files are extracted, starting time configuring the files.
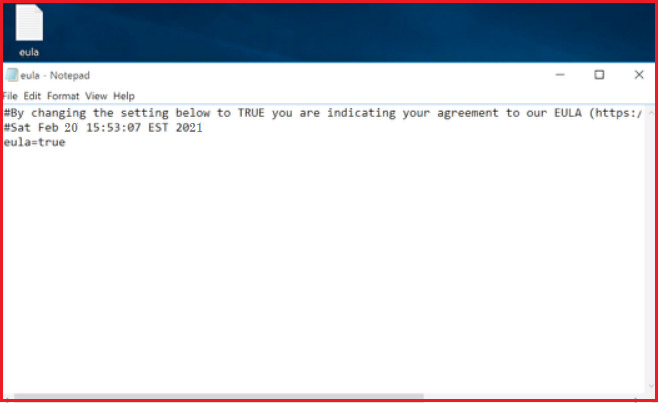
Open Minecraft EULA, at beginning. Yous need to agree to the EULA document before running Minecraft. Then, open eula.txt file and Accept the user license understanding. Alter eula=imitation to eula=truthful and relieve the file.
Suit server settings from server.backdrop file. Make all the changes required. And then, salve the file.
Want to know the process of adjusting the server settings?
Well, server.properties file determines all the essential settings, such as memory, server port, and game settings. Port 25565 is the pre-determined server port.
#5: Run the Minecraft Coffee File
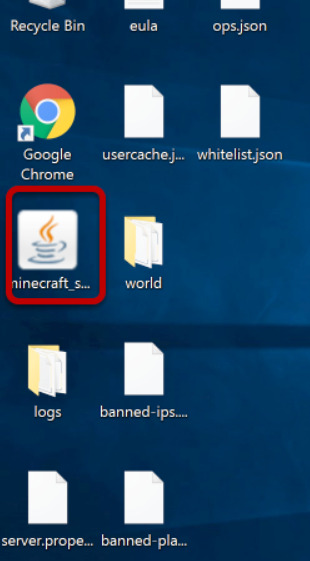
To run the Minecraft java file, open up the Minecraft file on your Windows 10 figurer.
This file is the same equally the one we opened for extracting files earlier in pace iii.
#6: Allow Access
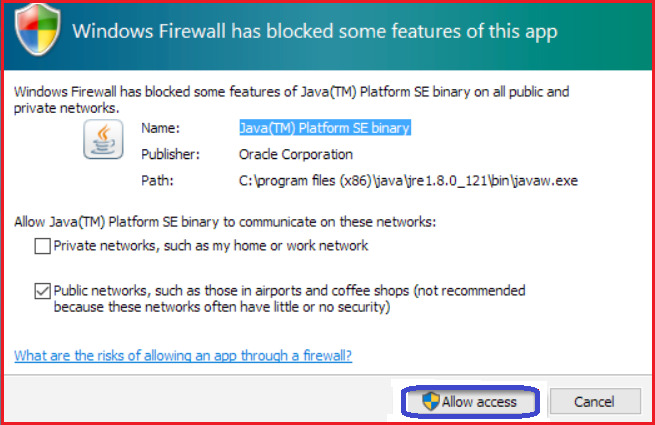
And then, hit the "Let admission" button to permit the Minecraft Server to operate in the firewall.
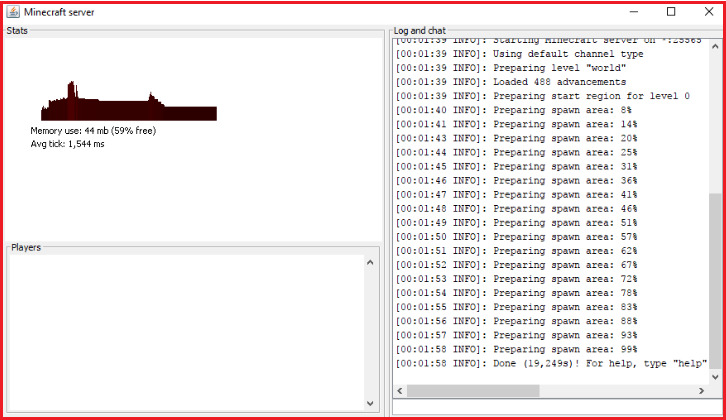
#seven: Review and Connect with Minecraft Server
When your Minecraft server install becomes successful, a Minecraft stats window appears as shown below.
If your local PC is unable to keep up with the details needed for running a multiplayer server, you need a cloud server for a improve experience.
In one case your cloud server is installed, connect to it from your Minecraft server.
E'er choose "Multiplayer" and click "Add Server".
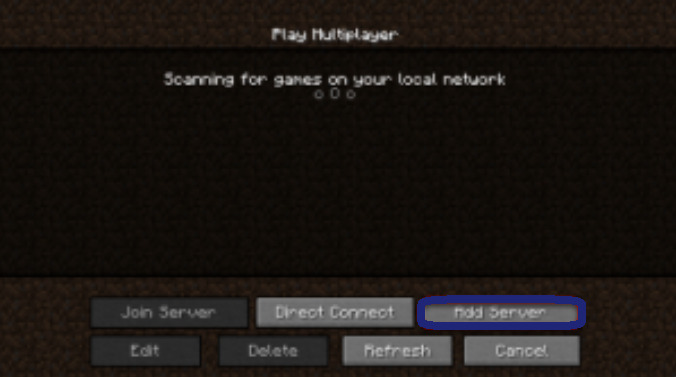
You need to enter the info required and you're "Done".
Want to know your Minecraft server IP address? Google is where y'all need to go and type "what'southward my IP" in the search.
If your friends are unable to reach out, give access to port 25565 from the router. Your home IP address keeps on changing, so provide the updated connection info to your gaming partners. However, if you're on a deject server you can continue the same IP e'er.
Hit that Play push button, now, and offset playing!
The Alternate Mode
You tin install a Minecraft server on Windows through coding as well.
For that, open the command prompt and achieve out to the already downloaded Minecraft folder. For example:
cd Documents/Minecraft
Afterward that, type and execute this given command:
java -Xmx1024M -Xms1024M -jar minecraft_server.1.15.2.jar nogui
And you'll go a screen like this:

The Bottomline
And we're washed with installing the Minecraft server on Windows. In this tutorial, you lot've learned to build your ain server. Congrats!
Your gaming friends should be able to reach out via your Minecraft server.
If yous want to customize the server with mods and plugins, follow the above steps and change the default JAR to a Spigot, Feed The Beast, or Forge.
Source: https://www.shells.com/l/en-US/tutorial/A-Guide-to-Installing-Minecraft-Server-on-Windows-0
Posted by: martinezlech2001.blogspot.com
0 Response to "How To Make Minecraft Server On Windows 10"
Post a Comment